Tag Archives: DIY

Not another one!

4 Feb

As you can probably tell I love trying out new crafts and different ways of doing things. Thanks to the other half I now have a new toy, my mother will not approve of it when she finds out considering she still bans me from having candles (this is with good reason as I do like to play with them!) she will not be impressed to find out I now have a Pyrography tool 😀

Time to BURN ALL THE THINGS!

Looking around online was a bit overwhelming with what people can do with these however I already feel that I will have my own style to put to use here to create something a bit different. 

One person I found and really love the syle of is http://howlmoonshinehowl.tumblr.com/, below being one of my favourites with the wood burning technique and pop of colour.

I have some bits and pieces of wood for practicing on so will look forward to doing that in a well ventilated area as after one short practice session the whole living room stinks of burnt wood (that is saying something as it is a room that has a wood stove burner which doesn’t leave a smell!)

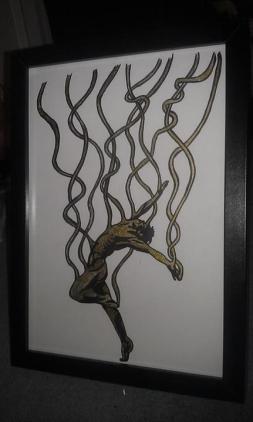
this little guy is my first practising piece. Using an illustration I created last year as its base. 

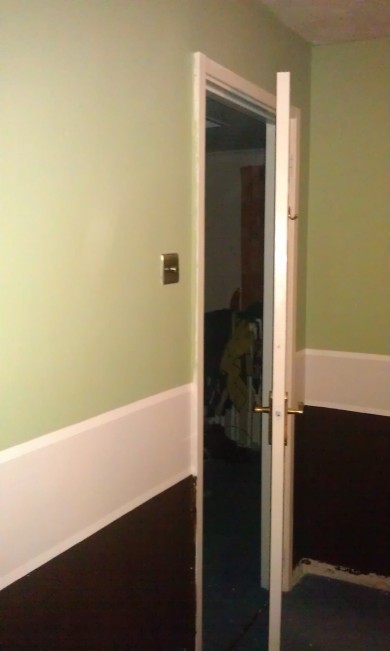
However I have to hold off of all that for this week at least as I have let house hold chores slip and am in the process of decorating the bedroom which I have to complete before I get bored! lots of straight lines have been painted! ImageNext a skirting board to attach. 

New Year, New hopes and New Projects

31 Dec

So as 2013 comes to a close I realise that I have been in our new house for a year now. It has been a busy year but also enjoyable and I have decided to mark it all by getting a tattoo, my first, on my forearm. I wanted something that I have drawn myself and came up with the following image. In designing this it became more and more exciting to think that tattooing may be a way to do more artwork at a level that would allow me to do something more creative full time. So 2014 will be a year of hard work, non stop drawing and going from there! 


The Last project of 2013

I had time over this Christmas break to finish off a unit I bought for the living room. It was a pain in the arse to do and took longer than I was expecting but its done sans handles. 

As purchased:

Paint stripped

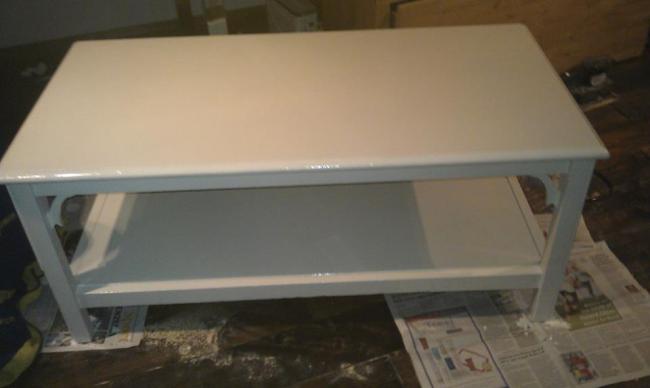
Repainted and wallpapered top:

And completed sans the handles but with a fancy stag making up for it:

SO thats it! My final update for this year. Its been a good one! 


‘Tis the season for furniture up cycling and drawing mashups! UPDATE

14 Dec

It is at this time of year that I really am happy that my work runs a flexi time policy as I can use up holiday and flexi to have off every Friday of December making for four long productive weekends. So this shall be a longer update than usual. 

This year they haven’t been that productive as I have been sidetracked by Kingdom Hearts 1.5 and being ill/lazy. However! This weekend whilst on a mixture of having a cold and trying to stave it off with nothing but an energy drink, a starbucks toffee nut latte and other forms of caffeine I have managed to out chore all previous weekends. This has resulted in finding an amazing corner shelf unit at our local YMCA, a hideous wooden clock (that I needed for the clock piece as it was cheap), a table that will be upcycled to form a new tv unit, finishing off a bench that I wanted to work on and putting up the Downy Tree!

First The Bench! 

I bought this bench wanting to do wondrous things to it so that it went with a mis matched dining room set. And it still goes. However I have two benches and only need one so for now have stuck the second one on ebay. If you like it please feel free to bid or ask questions! http://www.ebay.co.uk/itm/Black-gloss-bench-dining-room-sitting-black-seat-chair-/141141363694?pt=UK_Home_Garden_LivingRoom_Bookcases&hash=item20dcae4bee. 

Image 

Updates on the other new pieces once they have been delivered!

The Second update!

So I have still been doing a few drawings and working towards having a collection for a viewing night my husbands boss wants to hold for me with champagne and the likes. Half of the proceeds to me, half to charity. Should be a fun evening! But those pieces are all based around beautifully sculpted male bodies and the explosions of beauty, strength and other flowery words that describe vivid colour. A few examples:

ImageImageImage


But to have a break from all of those, I chose to do a Walking Dead meets Dr Who Mash up piece. 

Image

I really must get round to scanning these rather just the rough photos I manage to take with my decrepit phone. 

So that’s the update! Post Christmas expect some new furniture, new drawings and who knows what else!

As always the drawings on this page are for sale unless otherwise stated and I am often open for Commissions, you only need ask 🙂

And now I am off to have my arse kicked by Shao Kahn in Mortal Kombat! 


Babies, Table Saws and Board Games

3 Oct

It’s hard to believe I have been in my new house for coming up to a year! To look at all the work still needed you wouldn’t think we had been in that long but when money runs out the work slows down. 

With all that in mind we thought that this would be the perfect year to try and make our family of three – me, husband and Sparky the cat – a family of four. 

In my mind from everything I have ever been told about teenagers and sex is “don’t have unprotected sex, you WILL get pregnant”. I also had a GP who would constantly ask me when I was planning babies and that she thought I would get pregnant straight away. I would have preferred a GP who was honest. After the first month of trying and no success I looked into the actually chances of creating life.

I wish I hadn’t. It turns out the actual time you can conceive can be as tight a spot as a 1 2 hour time period in the month. This can be anywhere from 7 – 21 days after your last period which is a long old time! and from that the percentage of couples still trying after not just one but two years is amazingly high. I am amazed there are so many of us here with those odds! 

So you just carry on until you cant take the monthly disappointment any more and head to the Drs to see if there is a deeper reason than just bad timing. 

Back to the DIY of the actually works kind! It’s my birthday soon and as any good upstanding woman should, I have been researching which Table Saw I would like 😀 The information on this subject is just as confusing as the above one! Do I need it to mitre? Yeah why not. Does it come with its own fold out trays? Yeah maybe I want that. I still have a few weeks to do my research and find the right Table Saw for my womanly needs. 

And Finally!

At a recent board game day at the pub I came across my own idea for a board game using cats and the domestication process. I have the basis drawn out and have played through the first two phases and have just to finalise the last one before I can start work on a bit more detailing and working out the bugs of how to win/lose! 

With all that there hasn’t been much room for new drawings except for a realistic version of Professor Layton that I worked on and is now sold. Image

Refurbished Coffee Table

26 Aug

In our flat we had a huge manly solid oak block coffee table. It was chunky and took up so much space! Once moved into our new house, it remained the same huge beast taking up its pride of place in front of the fire place blocking all the heat so it was time to look for a new table. 

Having sunk most of our money into house hold items and DIY this year I thought why not look into a second hand furniture shop to give refurbishing a go and so we headed over to the YMCA in Tunbridge Wells. There is some beautiful huge old furniture in there but again the thing there is huge! 

Eventually after a few Saturdays of looking Jonathan  stumbled across this horrible table for £10ImageI wasn’t sure what to do with it but for £10 why the hell not, even if it had a few little edges missing.

I thought on the idea of painting the table cream and doing some sort of black detailing and went to Homebase to get the things I needed, taking advantage of the Bank Holiday discounts they always have – I have never shopped there when everything is full priced!

Tools purchased: Cream and Black satin wood paint, clear wood varnish.

Then it was off to the sewing shop for a cushion pad and fabric as we wanted to make a comfortable bed for the cat to put on the bottom shelf. 

Items purchased: Rectangle foam pad and 1.2 meters of upholstery fabric. 

By this point the price has increased further than I had wanted to pay….£30 for the paint and varnish and an eye watering £30 for cushion pad supplies.

Nether the less I set about a light sanding of the table and applied the first layer of cream paint. 

ImageI was already amazed how different our ugly table was looking!

Next up came a second layer and a day later after drawing up what writing I wanted on the top and in what style I cut the stencils for my lettering out and placed them on the top (turns out what I had thought was dead centre wasn’t….but I guess I will learn to measure better…ok measure at all rather than judge by eye, patience is not my strong point).

A night of drying later I made my cushion in the meantime, cutting the foam to size and sewing the fabric in place tightly over it. 

And after all that work we have our new finished table which I am really happy with and think it looks amazing in the living room helping to lighten the space dramatically.

ImageImage


Although it ended up costing around £60 – £70 mark, I think something similar in the shops would have set us back over £100 so I am defo happy that Jonathan found the perfect table for this project 😀


Cravat him!

14 Jul

There is something to be said about a man in a fine suit and a well dressed neck.

 
A cravat goes a long way to making a statement. And that statement is that this is being worn by one fine man. It has been scientifically proven that men with a good level of stubble growth are more sexually attractive and I don’t argue with science, but do you know what? That experiment did not take into consideration whether that man was dressed in a smashing suit and tie combo! So dress your neck to look your best and if the gentleman in question also has an outstanding moustache, then all the better I took all of this onboard and with the upcoming wedding of my sister-in-law, I thought I would make my husband a nice cravat to match the bridesmaid dress I have to wear.
 
After some shopping around I found a lovely green and purple paisley print and knew I had to make it and so I did! Below is the item in action hanging from a tree, I have to wait to buy a cravat pin before getting it being worn on camera.
 
I had to buy a fair bit of material as it was the end of the line so have decided to share this lovely fabric and am selling a few handmade high quality cravats and matching pocket squares.
 
Image
 

Summer planters

14 Jul

My husband said to me one day that he would like a rustic wooden planter and I thought “how hard can that be?” A quick shop around B&Q and I found the wood and nails I needed with a nice pot of Cornflower Blue outdoors paint. 

The tutorial for doing it is only being explained here as I only have the two end pieces photographed as I thought too late to take more. 

1. Measure and cut wood to know how many planks you need – 4 per side then how high you would like it.

2. Place planks on your designated leg wood and cut out, either leaving space for feet or flat on the floor

3. Cut legs to size.

4. Nail in wood to legs – a handy tip is that if you find the wood harder to nail when doing a different side, it helps to rest the leg on a side edge to stop it moving and when connecting the final piece, having a big bit of wood inside to hammer against. Always be careful with hammers as you can and may hit your finger!

5. Size up the bottom and nail in the base 

6. PAINT! You can go more down to earth like the cornflower blue or…brighten up your garden with a fantastic pink!!!

ImageImage


After having more of a practice with these, I am hoping to hit a craft fair for the first time ever with a few of them 

Find a hobby and stick to it?

15 May

I love finding new things to try and do with the mind set of “If I haven’t done it yet, I want to” This has led me to try lots of new things but not really be great at any of them as once I have tried it, had a success I move on. Everything I try I will look up on google, maybe watch a youtube tutorial and then just jump right in and give it a shot after buying the materials needed!

All I can say is that if you want to try make something then go ahead and give it a shot. It may not be perfect but that photo tutorial you are using for inspiration has been made by someone who has probably spent years perfecting their chosen craft rather than driffting from one thing to another. Or they could be one of those people who just rock at everything.

Crotchet

As a child my nan taught me how to knit but I never actually learnt how to cast on or off, just how to sit for hours and make a scarf that someone else had to finish neatly for me. Fast-forward to now and I realised I have never tried Crocheting and really wanted to make some amarguani toys after seeing some cute ones! I got some cheap hooks from ebay, some wool from a local pound shop and started.

The first thing I made was a Totoro. He is crude and I never kept the tension of the wool consistant so he has bigger gaps than I would like in some places and the ears arnt right however he was a good learning starter toy as it pointed out shapes and connecting different attachments like arms.

The next ones I tried were a collection of pokemon from a website that I now can’t find so if anyone knows this very clever lady then please let me know her link! Offering free patterns that are really good!

Along with a few other patterns that I followed, I also made these three hello kitty small toys for my cousins birthday, they have tiny hats that can be either up or down to make them hello kitty or their character! Made using my own patterns a bumble bee, a panda and a rabbit.

Tiling! and I guess DIY in general

Ok so maybe not a hobby or a proper craft however whilst doing up my house I am trying all things before paying a man to do them as it turns out a hell of alot of house work can be done yourself! So hello Mr fireplace, meet Kirsty – the woman on a mission to learn how to tile not one a plain simple wall o no.

I had a lot of success here as tiling as it turns out is easy, what is not so easy is when the walls you work on are uneven, that way problems lie but with a bit of inventiveness even this you can over come (the middle lower part somehow didn’t match up despite the tiles being the same, so two bits of mirror were cut and stuck in to create mirror tiles which look great)

I also made the stag head mirror above the fireplace.

Baking

I do alot of baking and will try things once before moving onto the next thing! Cupcakes are easy however I can never be bothered prettying them up, these Dr Who cakes are the only time I attempted to fancy ice cakes and really could not be bothered with the effort of something that would be eaten too quickly so they are a little lacking but tasted good 😀

Peanut butter rice krispie chocolate fudge cake! Boom!

A friend set me the challenge that “brioche burger buns were too hard to make”

NONSENSE! a tiny bit of baking induced RSI (due to no mixer so all by hand) I had a batch of deliciously sweet brioche burger buns that held together to the very end of the burger.

Drawing

I guess drawing is my own long running hobby as I will always sit and draw in front of the tv whether its made up images or copied from one source or another, anything to keep my hands moving. I will sometimes try drawing on my dated tablet but its not my favourite.

Sewing!

And now we get to why I started this entry. Yesterday, whilst in a bad mood I decided to buy a sewing machine as I need some cushions for my new sofa but dont like any on sale so on wards and upwards to make my own and maybe a costume for my cat, you know, becasue I love him enough to hummiliate him for my own entertainment adn to have cutes on facebook making me look like a crazy cat lady 😀

Burgers, a film and DIY

29 Apr

This weekend has been a long one! With little sun to draw me outside I decided to do some chores indoors.

1. I was challenged by a friend that Brioche Burger Buns were very hard to make…Challenge accepted and after a successful trial this weekend he will be getting a batch of homemade buns to call his own. They were surprisingly easier, just taking time for the yeast to work its magic and 10 mins of slapping dough onto a counter top resulting in a very good arm work out and a delicious burger bun.

How it stood up:

THe buns themselves are light and cut well so that when placed under the grill with some cheese on htey crisped up to the right level of tosted. Two burgers were made – one with emmental cheese, garlic mayo, avacado, flat cajun mushroom, lettuce and onion rings. This one really tested the construction of the bun as the mushroom was very watery and dripped however not once did the bun fall apart even till the final bite! Very happy.

The second was also emmental cheese, beef burger, onion relish and some other things that I stopped paying attention to as my husband made this one and I was busy already tucking into mine! However with the huge amount of relish and juicy meat his also refused to fall apart making them a total success!

Image

2. Iron man 3!

The evening saw us hitting Tunbridge wells Odeon for Iron Man 3 which I was very excited about. O2 moments provided us with a free large popcorn and I booked online so didnt have to que for tickets. The cinema itself was very clean, new and a great change from my old one at Bromley!

The film really was going back to the fun, charm and all round epicness that was Iron Man 1. Downey Jr and friends were all on top form to create a stunning film where the graphics team have worked very hard as the Iron men suits are just amazing! If you are also a massive film fan then make sure you stay till after all of the credits for the extra snippet awaiting you.

3. DIY. and there was alot of it! Fireplace has been tiled, curtains have been hung, skirting board has been stained, and two benches have been sanded and painted black with glitter. They are our glamour benches for the dining table which sound like they could be trashy but look amazing next to a light blue wash table with silver legs. They were hard work sanding down but worth it as they no longer look like they cost me £25 for the pair of them.ImageBefore

ImageAfter

You don’t need to get a man in to do that!

24 Apr

When I did some research into finding a handy man, I found many that offered cat flap installation services. I always thought how hard can it be to install a cat flap? Turns out not very hard and where I could have spent £40 for an hour min to have a man round, I instead spent 10 mins on the kitchen floor and have a nicely installed cat flap! 

If you have a glass door then things become difficult as you need glass cutters which I don’t have and wouldn’t want to mess around with in a whole door. However a wooden etc door then look at the following for a how to.

1. Read the instructions (I say this as some models may be different but mine was the Sureflap electronic microchip cat flap)

2. using the back part of the flap mark out on the door where you intend to install it, make sure it is not too high up as some cats will have trouble getting used to a first time catflap.Image

Once you have measured out the area (by tracing the shape of the catflap) drill a hole where the two side screws will go and a hole in the centre of the hole. Once you have this whole, using a jigsaw cut outwards to the edge and carry on until the hole is complete.Image


3. Once you have your hole cut out make sure the cat flap tunnel fits in it, if it is too small then cut out a little bit more from the hole where needed. Always cut in small amounts at this point as it is easy to cut more if needed.

4. Place cat flap, screw into place and make sure it is secure and there you have it! Image

That really isn’t worth getting a man in and is a very easy job. My husband was surprised to see I had it done in the time he was upstairs getting dressed to help me. 

I also know that it will be easy to uninstall and reinstall when we get around to buying a new fancier kitchen door that isn’t plastic.Â